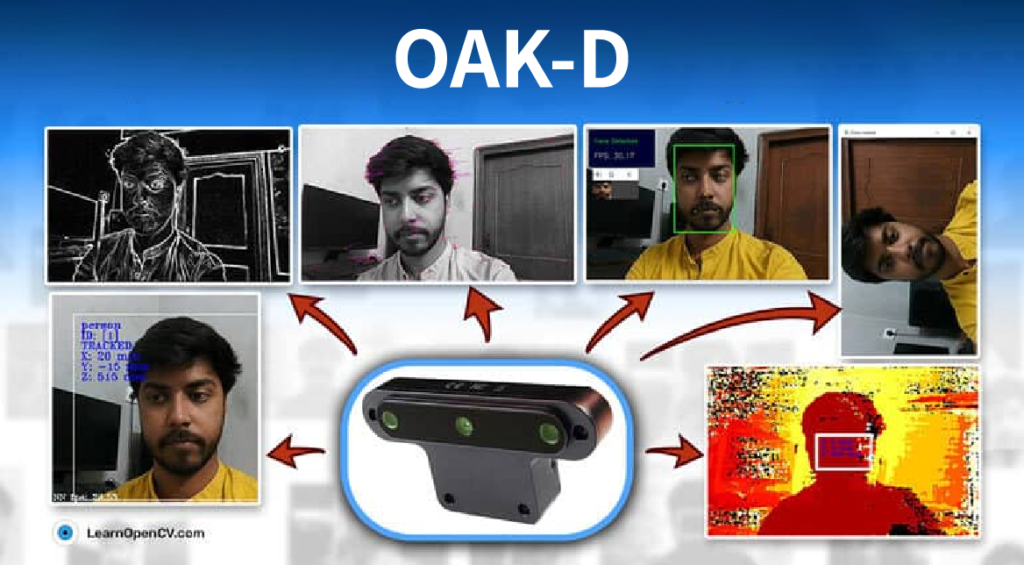
OpenCV CEO教你用OAK(四):创建复杂的管道
1.介绍
这是此系列的第四篇文章,前三篇文章内容如下:
在这里,我们将仔细看看DepthAI管道(pipeline),它的不同节点(nodes),以及这些单独的节点如何组合在一起创建一个工作系统。
在之前的文章中,我们已经看到了一些起作用的节点。在这里,我们将更多地关注那些我们到目前为止还没有尝试过的方法。
2.管道
来自DepthAI的任何动作,无论是神经推理还是彩色相机输出,都需要定义一个管道,包括对应我们需求的节点和连接。
在管道中,不同的节点相互连接,数据以定义的顺序从一个节点流向另一个节点,同时在每个节点对数据执行不同的操作。
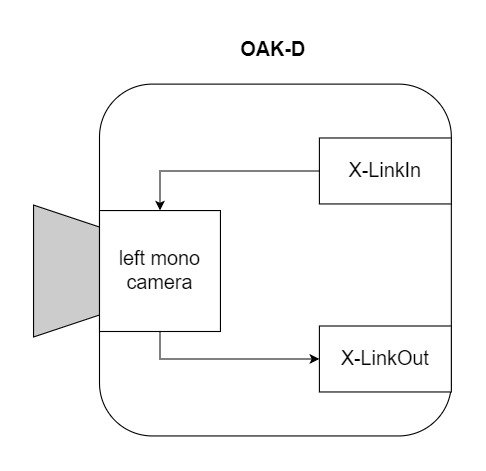
这里有一个简单的管道来获得OAK-D上的黑白相机模块的输出。
首先在主机上创建管道,定义节点之间的连接和数据流。然后,在初始化期间,定义的管道被发送到OAK设备,并使用来自摄像机和其他模块的所需输入来运行,输出被发送回主机。
让我们看看可供我们使用的不同节点,以及我们如何使用它们。
3.节点
到目前为止,我们知道节点是DepthAI管道的构建块,但节点本身是什么?
你可以将每个节点视为一个函数,它对一组给定的输入应用一些操作,并产生一组输出。
现在,这些节点可以链接在一起,这样一个节点的输出就可以作为管道中另一个节点的输入。
我们已经在以前的文章中看到了一些节点,如StereoDepth、MonoCamera和其他NN节点。让我们看看更多可供我们使用的节点,以及每个节点的用途。
3.1 XLinkIn/XLinkOut
XLinkIn和XLinkOut是两个最基本的节点,它们使主机能够与OAK设备进行交互。
XLinkIn
XLinkIn节点用于从主机向设备发送数据。

输入:
任何输入都可以从主机端发送到设备。
输出:
节点的输出是来自主计算机的可以在管道中使用的未改变的输入。
语法:
pipeline = dai.Pipeline()
xlinkIn = pipeline.create(dai.node.XLinkIn)
XLinkOut
XLinkOut节点用于将数据从设备发送到主机。

输入:
任何输入都可以从设备发送到主机端。
输出:
节点的输出是主机可以使用的来自设备计算机的未改变的输入。
语法:
pipeline = dai.Pipeline()
xlinkOut = pipeline.create(dai.node.XLinkOut)
3.2 彩色相机
ColorCamera节点是从RGB相机模块捕获的图像帧的来源。
可以使用InputControl和InputConfig在运行时控制和操作来自节点的输出图像帧,这可以用于更改不同的参数,如白平衡、曝光、聚焦等。
Camera节点本身内部有不同的组件:
1.图像传感器
正是物理图像传感器捕捉光线并产生原始图像帧。
2.ISP(图像信号处理器)
ISP与图像传感器通信,用于Bayer变换、去马赛克、降噪和其他图像增强。它还根据3A算法(自动对焦、自动曝光和自动白平衡)处理图像传感器调整,如曝光时间、感光度(ISO)和镜头位置。
3.后处理器Postprocessor
它将来自ISP的平面帧转换为视频/预览/静止帧。

输入:
- inputConfig – ImageManipConfig
- inputControl – CameraControl
输出:
- raw–img frame–raw 10 Bayer数据。
- ISP–img frame–YUV 420 planar(与YU12/IYUV/I420相同)
- still–img frame–NV12,适合较大尺寸的帧。当一个捕获事件被发送到ColorCamera时,这个图像就被创建了,所以它就像照一张照片。
- preview–img frame–RGB(或BGR平面/交错,如果已配置),最适合小尺寸预览并将图像输入到神经网络。
- video–img frame–NV12,适合较大尺寸的帧。
语法:
pipeline = dai.Pipeline()
cam = pipeline.create(dai.node.ColorCamera)演示:

3.3 边缘检测器EdgeDetector
边缘检测器节点使用Sobel滤波器来强调和查找图像帧中的边缘。

输入:
- inputImage – ImgFrame
- inputConfig – EdgeDetectorConfig
输出:
- output image–输出带有强调边缘的图像帧
语法:
pipeline = dai.Pipeline()
edgeDetector = pipeline.create(dai.node.EdgeDetector)演示:

3.4 特征跟踪器FeatureTracker
FeatureTracker检测一帧上的关键点(特征),并在下一帧跟踪它们。
有效特征从Harris score或Shi-Tomasi中获得。目标要素的默认数量为320,最大默认数量为480。
它目前支持的分辨率:720p和480p。
输入:
- inputConfig – FeatureTrackerConfig
- inputImage – ImgFrame
输出:
- outputFeatures – TrackedFeatures
- passthroughInputImage–img frame
语法:
pipeline = dai.Pipeline()
featureTracker = pipeline.create(dai.node.FeatureTracker)演示:
3.5 ImageManip
ImageManip节点可用于裁剪、旋转矩形区域或在图像帧上执行各种图像变换,如旋转、镜像、翻转、透视变换。

输入:
- inputImage – ImgFrame
- inputConfig – ImageManipConfig
输出:
- Modified Image Frame
语法:
pipeline = dai.Pipeline()manip = pipeline.create(dai.node.ImageManip)演示:

3.6 IMU
IMU(惯性测量单元)节点可用于接收来自器件上IMU芯片的数据。
DepthAI设备使用BNO085 9轴传感器,支持(IMU(芯片本身的传感器融合。IMU芯片具有多个板载传感器,即加速度计、陀螺仪和磁力计。
注:OAK-D 配有IMU传感器,OAK-D-Lite 没有。如果你想使用IMU传感器,建议你在购买前检查设备规格。

输入:
这个节点不需要任何输入。
输出:
- IMU数据
语法:
pipeline = dai.Pipeline()imu = pipeline.create(dai.node.IMU)演示:

3.7 对象跟踪器ObjectTracker
对象跟踪器节点从检测输入中跟踪检测到的对象。它使用卡尔曼滤波器和匈牙利算法进行跟踪。
输入:
- inputDetectionFrame–img frame
- inputTrackerFrame–img frame
- inputDetections – ImgDetections
输出:
- out – Tracklets
- passthroughDetectionFrame – ImgFrame
- passthroughTrackerFrame – ImgFrame
- passthroughDetections – ImgDetections
语法:
pipeline = dai.Pipeline()objectTracker = pipeline.create(dai.node.ObjectTracker)演示:
3.8 脚本Script
脚本节点允许用户在设备上运行自定义Python脚本。由于计算资源的限制,脚本节点不应该用于繁重的计算(例如,图像处理/CV),而是用于管理管道的流动。
示例用例包括控制ImageManip、ColorCamera、SpatialLocationCalculator等节点、解码NeuralNetwork结果或与GPIOs接口。

输入/输出:
用户可以根据需要定义任意多的输入和输出,输入和输出可以是DepthAI支持的任何Message类型。
语法:
pipeline = dai.Pipeline()script = pipeline.create(dai.node.Script)3.9 空间位置计算器SpatialLocationCalculator
SpatialLocationCalculator可以基于来自inputDepth的深度图和由inputConfig提供的ROI(region-of-interest)来计算深度。
该节点将对ROI中的深度值进行平均,并移除超出范围的深度值。

输入:
- inputConfig – SpatialLocationCalculatorConfig
- inputDepth – ImgFrame
输出:
- out – SpatialLocationCalculatorData
- passthroughDepth – ImgFrame
语法:
pipeline = dai.Pipeline()spatialCalc = pipeline.SpatialLocationCalculator()演示:

3.10 视频编码器VideoEncoder
VideoEncoder节点用于将图像帧编码成H264/H265/JPEG,这可用于保存设备的视频输出。

输入:
- input – ImgFrame
输出:
- bitstream – ImgFrame
语法:
pipeline = dai.Pipeline()encoder = pipeline.create(dai.node.VideoEncoder)3.11 系统记录器SystemLogger
SystemLogger节点用于获取设备的系统信息。
该节点提供设备上所有资源(如内存和存储)的使用信息,它还提供处理器利用率和芯片温度等统计数据。

输出:
- out – SystemInformation
语法:
pipeline = dai.Pipeline()logger = pipeline.create(dai.node.SystemLogger)演示:

4.通过链接节点实现复杂管道
现在我们已经了解了不同的DepthAI节点以及如何创建一个简单的管道。让我们更进一步,利用这些知识创建一个稍微复杂的管道。
我们将创建一个管道来进行人脸检测,此外,在检测人脸区域进行地标检测。所有这些都将在设备上完成,我们将只获得管道的最终输出,即检测到的面部边界框和检测到的界标。
在查看代码之前,让我们先了解一下管道的概况,以及管道中使用的不同节点是如何连接的。

4.1 代码(面部检测+面部标志检测)
导入所需模块
import cv2
import depthai as dai
import time
import blobconverter
定义帧大小
FRAME_SIZE = (640, 400)
定义检测神经网络模型名称和输入大小
我们将使用来自Depthai model zoo的“face-detection-retail-0004”模型。
它是一个人脸检测模型,给出图像帧中检测到的人脸的边界框坐标。
# If you define the blob make sure the FACE_MODEL_NAME and ZOO_TYPE are None
DET_INPUT_SIZE = (300, 300)
FACE_MODEL_NAME = "face-detection-retail-0004"
ZOO_TYPE = "depthai"
blob_path = None
定义地标神经网络模型名称和输入大小
我们将使用Open Model Zoo中的”landmarks-regression-retail-0009”模型。
这是一个面部标志检测模型,提供了面部的五个标志:左眼,右眼,鼻子,嘴唇的左角和嘴唇的右角。
# If you define the blob make sure the LANDMARKS_MODEL_NAME and ZOO_TYPE are None
LANDMARKS_INPUT_SIZE = (48, 48)
LANDMARKS_MODEL_NAME = "landmarks-regression-retail-0009"
LANDMARKS_ZOO_TYPE = "intel"
landmarks_blob_path = None
开始定义管道
pipeline = dai.Pipeline()定义源-RGB相机
cam = pipeline.createColorCamera()
cam.setPreviewSize(FRAME_SIZE[0], FRAME_SIZE[1])
cam.setInterleaved(False)
cam.setResolution(dai.ColorCameraProperties.SensorResolution.THE_1080_P)
cam.setBoardSocket(dai.CameraBoardSocket.RGB)
定义用于人脸检测的神经网络节点
# Convert model from OMZ to blob
if FACE_MODEL_NAME is not None:
    blob_path = blobconverter.from_zoo(
        name=FACE_MODEL_NAME,
        shaves=6,
        zoo_type=ZOO_TYPE
    )

# Define face detection NN node
faceDetNn = pipeline.createMobileNetDetectionNetwork()
faceDetNn.setConfidenceThreshold(0.75)
faceDetNn.setBlobPath(blob_path)
为地标检测模型定义神经网络节点
# Convert model from OMZ to blob
if LANDMARKS_MODEL_NAME is not None:
    landmarks_blob_path = blobconverter.from_zoo(
        name=LANDMARKS_MODEL_NAME,
        shaves=6,
        zoo_type=LANDMARKS_ZOO_TYPE
    )

# Define landmarks detection NN node
landmarksDetNn = pipeline.createNeuralNetwork()
landmarksDetNn.setBlobPath(landmarks_blob_path)
定义用于人脸和地标检测的ImageManip节点
# Define face detection input config
faceDetManip = pipeline.createImageManip()
faceDetManip.initialConfig.setResize(DET_INPUT_SIZE[0], DET_INPUT_SIZE[1])
faceDetManip.initialConfig.setKeepAspectRatio(False)

# Define landmark detection input config
lndmrksDetManip = pipeline.createImageManip()
链接相机、人脸图像映射和人脸检测神经网络节点
# Linking
cam.preview.link(faceDetManip.inputImage)
faceDetManip.out.link(faceDetNn.input)
定义脚本节点
脚本节点将把面部检测神经网络的输出作为输入,并为界标神经网络设置ImageManipConfig。
script = pipeline.create(dai.node.Script)
script.setProcessor(dai.ProcessorType.LEON_CSS)
script.setScriptPath("script.py")
script.py
import time


# Correct the bounding box
def correct_bb(bb):
    bb.xmin = max(0, bb.xmin)
    bb.ymin = max(0, bb.ymin)
    bb.xmax = min(bb.xmax, 1)
    bb.ymax = min(bb.ymax, 1)
    return bb


# Main loop
while True:
    time.sleep(0.001)

    # Get image frame
    img = node.io['frame'].get()

    # Get detection output
    face_dets = node.io['face_det_in'].tryGet()
    if face_dets and img is not None:

        # Loop over all detections
        for det in face_dets.detections:

            # Correct bounding box
            correct_bb(det)
            node.warn(f"New detection {det.xmin}, {det.ymin}, {det.xmax}, {det.ymax}")

            # Set config parameters
            cfg = ImageManipConfig()
            cfg.setCropRect(det.xmin, det.ymin, det.xmax, det.ymax)
            cfg.setResize(48, 48)
            cfg.setKeepAspectRatio(False)

            # Output image and config
            node.io['manip_cfg'].send(cfg)
            node.io['manip_img'].send(img)
链接到脚本输入
cam.preview.link(script.inputs['frame'])
faceDetNn.out.link(script.inputs['face_det_in'])
将脚本输出链接到地标ImageManipconfig
script.outputs['manip_cfg'].link(lndmrksDetManip.inputConfig)
script.outputs['manip_img'].link(lndmrksDetManip.inputImage)
将ImageManip输出链接到Landmark NN
lndmrksDetManip.out.link(landmarksDetNn.input)创建输出流
# Create preview output
xOutPreview = pipeline.createXLinkOut()
xOutPreview.setStreamName("preview")
cam.preview.link(xOutPreview.input)

# Create face detection output
xOutDet = pipeline.createXLinkOut()
xOutDet.setStreamName('det_out')
faceDetNn.out.link(xOutDet.input)

# Create cropped face output
xOutCropped = pipeline.createXLinkOut()
xOutCropped.setStreamName('face_out')
lndmrksDetManip.out.link(xOutCropped.input)

# Create landmarks detection output
xOutLndmrks = pipeline.createXLinkOut()
xOutLndmrks.setStreamName('lndmrks_out')
landmarksDetNn.out.link(xOutLndmrks.input)
在图像框上显示信息
def display_info(frame, bbox, landmarks, status, status_color, fps):
    # Display bounding box
    cv2.rectangle(frame, bbox, status_color[status], 2)

    # Display landmarks
    if landmarks is not None:
        for landmark in landmarks:
            cv2.circle(frame, landmark, 2, (0, 255, 255), -1)

    # Create background for showing details
    cv2.rectangle(frame, (5, 5, 175, 100), (50, 0, 0), -1)

    # Display authentication status on the frame
    cv2.putText(frame, status, (20, 40), cv2.FONT_HERSHEY_SIMPLEX, 0.5, status_color[status])

    # Display instructions on the frame
    cv2.putText(frame, f'FPS: {fps:.2f}', (20, 80), cv2.FONT_HERSHEY_SIMPLEX, 0.6, (255, 255, 255))
定义一些我们将在主循环中使用的变量
# Frame count
frame_count = 0

# Placeholder fps value
fps = 0

# Used to record the time when we processed last frames
prev_frame_time = 0

# Used to record the time at which we processed current frames
new_frame_time = 0

# Set status colors
status_color = {
    'Face Detected': (0, 255, 0),
    'No Face Detected': (0, 0, 255)
}
主循环
我们启动管道,从“预览”队列中获取视频帧。我们还分别从“det_out”和“lndmrks_out”队列获得面部和标志检测输出。
一旦我们有了边界框和界标输出,我们就在图像帧上显示它们。
# Start pipeline
with dai.Device(pipeline) as device:

    # Output queue will be used to get the right camera frames from the outputs defined above
    qCam = device.getOutputQueue(name="preview", maxSize=1, blocking=False)

    # Output queue will be used to get nn detection data from the video frames.
    qDet = device.getOutputQueue(name="det_out", maxSize=1, blocking=False)

    # Output queue will be used to get cropped face region.
    qFace = device.getOutputQueue(name="face_out", maxSize=1, blocking=False)

    # Output queue will be used to get landmarks from the face region.
    qLndmrks = device.getOutputQueue(name="lndmrks_out", maxSize=1, blocking=False)

    while True:
        # Get camera frame
        inCam = qCam.get()
        frame = inCam.getCvFrame()

        bbox = None

        inDet = qDet.tryGet()

        if inDet is not None:
            detections = inDet.detections

            # if face detected
            if len(detections) is not 0:
                detection = detections[0]

                # Correct bounding box
                xmin = max(0, detection.xmin)
                ymin = max(0, detection.ymin)
                xmax = min(detection.xmax, 1)
                ymax = min(detection.ymax, 1)

                # Calculate coordinates
                x = int(xmin*FRAME_SIZE[0])
                y = int(ymin*FRAME_SIZE[1])
                w = int(xmax*FRAME_SIZE[0]-xmin*FRAME_SIZE[0])
                h = int(ymax*FRAME_SIZE[1]-ymin*FRAME_SIZE[1])

                bbox = (x, y, w, h)

        # Show cropped face region
        inFace = qFace.tryGet()
        if inFace is not None:
            face = inFace.getCvFrame()
            cv2.imshow("face", face)

        landmarks = None

        # Get landmarks NN output
        inLndmrks = qLndmrks.tryGet()
        if inLndmrks is not None:
            # Get NN layer names
            # print(f"Layer names: {inLndmrks.getAllLayerNames()}")

            # Retrieve landmarks from NN output layer
            landmarks = inLndmrks.getLayerFp16("95")

            x_landmarks = []
            y_landmarks = []

            # Landmarks in following format [x1,y1,x2,y2,..]
            # Extract all x coordinates [x1,x2,..]
            for x_point in landmarks[::2]:
                # Get x coordinate on original frame
                x_point = int((x_point * w) + x)
                x_landmarks.append(x_point)

            # Extract all y coordinates [y1,y2,..]
            for y_point in landmarks[1::2]:
                # Get y coordinate on original frame
                y_point = int((y_point * h) + y)
                y_landmarks.append(y_point)

            # Zip x & y coordinates to get a list of points [(x1,y1),(x2,y2),..]
            landmarks = list(zip(x_landmarks, y_landmarks))

        # Check if a face was detected in the frame
        if bbox:
            # Face detected
            status = 'Face Detected'
        else:
            # No face detected
            status = 'No Face Detected'

        # Display info on frame
        display_info(frame, bbox, landmarks, status, status_color, fps)

        # Calculate average fps
        if frame_count % 10 == 0:
            # Time when we finish processing last 100 frames
            new_frame_time = time.time()

            # Fps will be number of frame processed in one second
            fps = 1 / ((new_frame_time - prev_frame_time)/10)
            prev_frame_time = new_frame_time

        # Capture the key pressed
        key_pressed = cv2.waitKey(1) & 0xff

        # Stop the program if Esc key was pressed
        if key_pressed == 27:
            break

        # Display the final frame
        cv2.imshow("Face Cam", frame)

        # Increment frame count
        frame_count += 1

# Close all output windows
cv2.destroyAllWindows
5.效果演示

6.结论
在这篇文章中,我们概述了DepthAI管道的不同部分,以及如何使用它们在节点之间创建连接来完成复杂的任务。
在下一篇文章中,我们将使用目前为止所学的一切,创建一个有趣的应用程序。
文章来源:learnopencv.com